Creating an App
This guide walks you through creating a new app in OCM Pulse.
Prerequisites
- You must be logged in to OCM Pulse
- You need permission to create apps in your organization
Steps to Create an App
1. Navigate to Apps
From the main navigation, click on Apps to see your apps list.
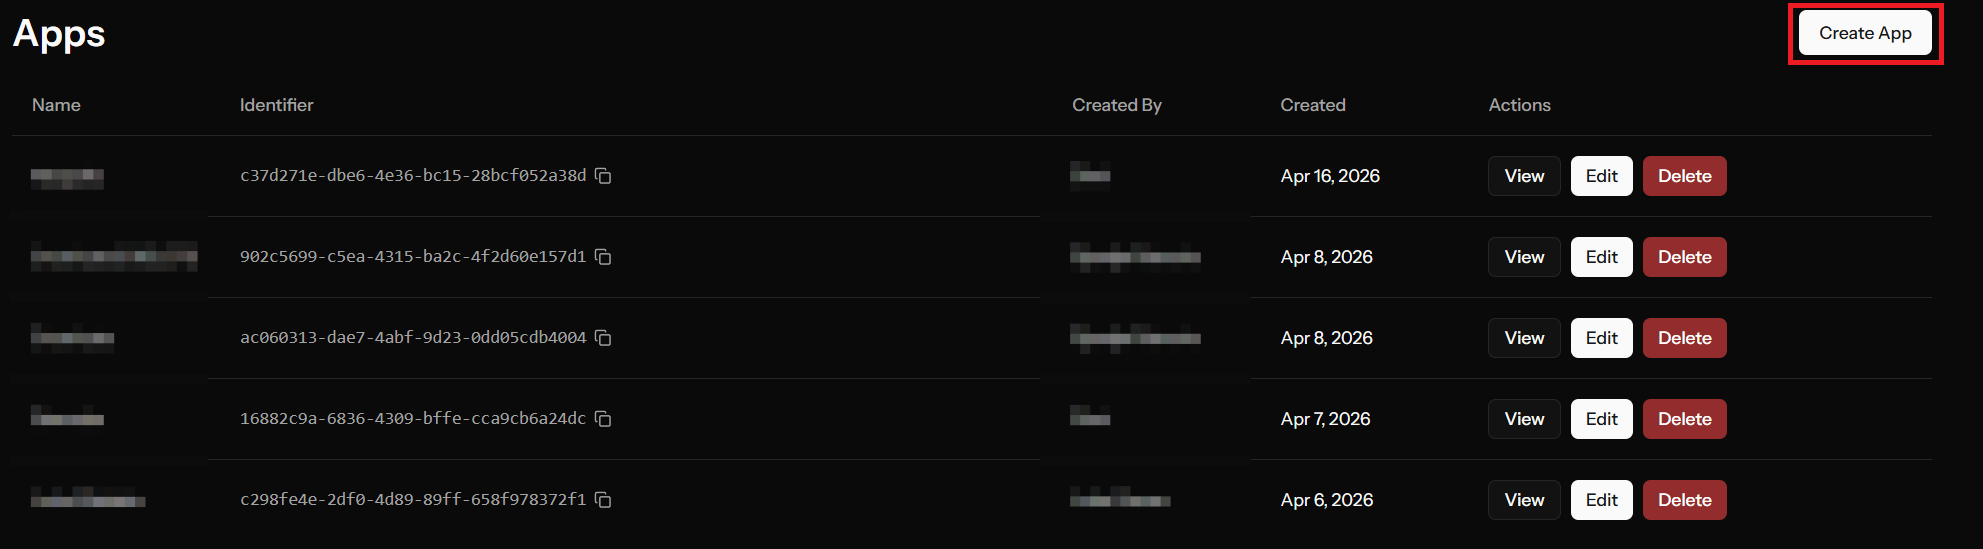
2. Click Create App
Click the Create App button in the top right corner of the apps list.
3. Fill in Basic Information
App Name (Required)
Enter a descriptive name for your app. This is for your reference and will appear in the dashboard.
Examples:
- "Company Blog"
- "E-commerce Store"
- "News Portal"
Site URL
Enter the full URL of your website where the SDK will be installed.
Format: https://yourdomain.com
Do not include a trailing slash. The system will automatically remove it if you do.
4. Configure Frequency Capping (Optional)
Frequency capping prevents notification fatigue by limiting how many notifications each subscriber receives.
To enable:
- Check the Enable frequency capping checkbox
- Set Maximum notifications (1-100)
- Choose a Time window:
- 1 hour
- 6 hours
- 12 hours
- 24 hours
- 1 week
Example: Setting max 3 notifications per 24 hours ensures subscribers see at most 3 notifications per day.
Both fields are required if you enable frequency capping.
5. Set Notification Defaults (Optional)
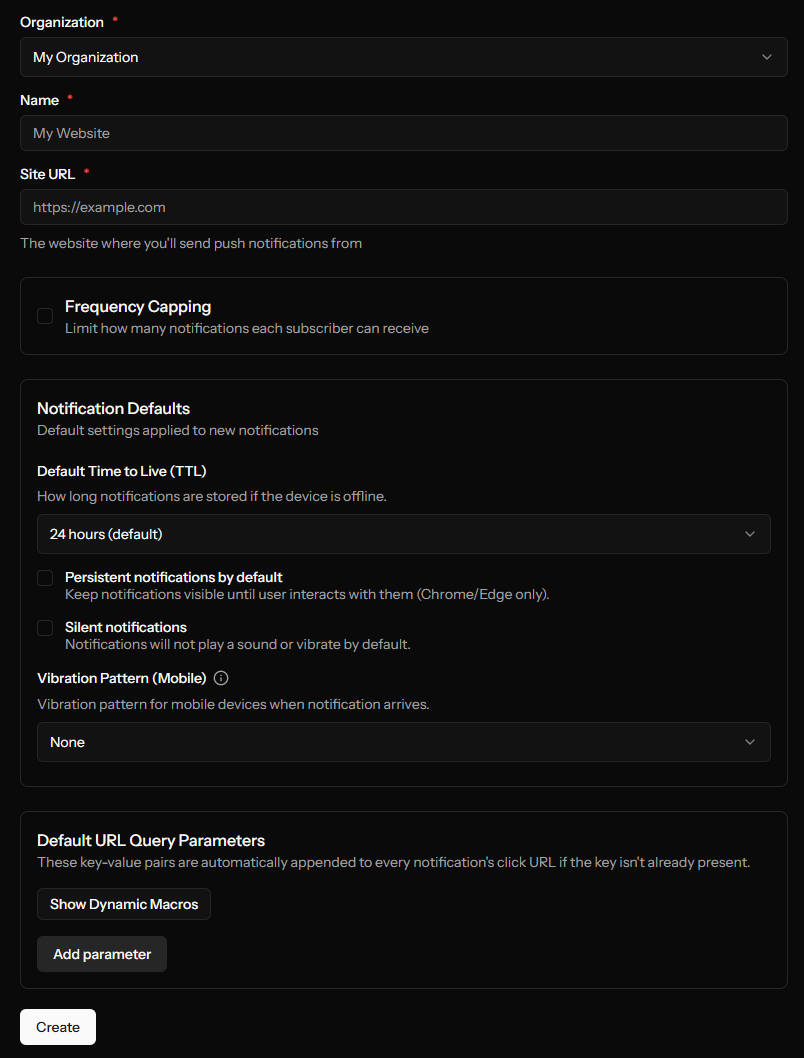
Default TTL (Time-To-Live)
How long notifications remain valid before expiring. Choose from:
- 1 hour
- 6 hours
- 24 hours (default)
- 3 days
- 7 days
- 28 days
If a subscriber's device is offline longer than the TTL, they won't receive the notification.
Require Interaction
When enabled, notifications stay visible until the user clicks or dismisses them. By default, notifications may auto-dismiss after a few seconds (behavior varies by browser/OS).
Default Silent
When enabled, notifications are delivered without sound or vibration. Useful for non-urgent, informational notifications.
6. Set Default Vibrate Pattern (Optional)
Configure a custom vibration pattern for notifications. The pattern is an array of up to 10 values (each 0-10,000ms) representing alternating vibrate and pause durations.
7. Set Default Query Parameters (Optional)
Add key-value pairs that are automatically appended to all notification click URLs. Useful for UTM tracking and analytics.
Example:
- Key:
utm_source→ Value:push - Key:
utm_medium→ Value:notification
You can add up to 20 key-value pairs. Keys may only contain letters, numbers, underscores, and hyphens.
Dynamic macros in values
Values can embed macros that are resolved at send time. Supported macros:
| Macro | Resolves to |
|---|---|
[category] | The delivery's category name (slugified). Empty if no category is set on the delivery. |
Example: utm_campaign=news-[category] → utm_campaign=news-breaking_news when the delivery is tagged with the "Breaking News" category.
8. Create the App
Click Create App to save your new app.
What Happens Next
After creating your app:
- You'll be redirected to the Channels page
- Your app receives a unique identifier (UUID)
- An API key is generated for REST API access
- You can now configure the Web Push channel
Common Issues
"Site URL is required"
The site URL is a required field when creating an app. Enter the full URL of your website (e.g., https://yourdomain.com).
"Name is required"
Every app must have a name. Use something descriptive that helps you identify the app.