Flash Trigger
The Flash Trigger lets you turn any article URL into a push notification in seconds. Paste a link, let OCM Pulse pull in the title, body, and image automatically, and send — no template, segment strategy, or scheduled campaign required.
Accessing Flash Trigger
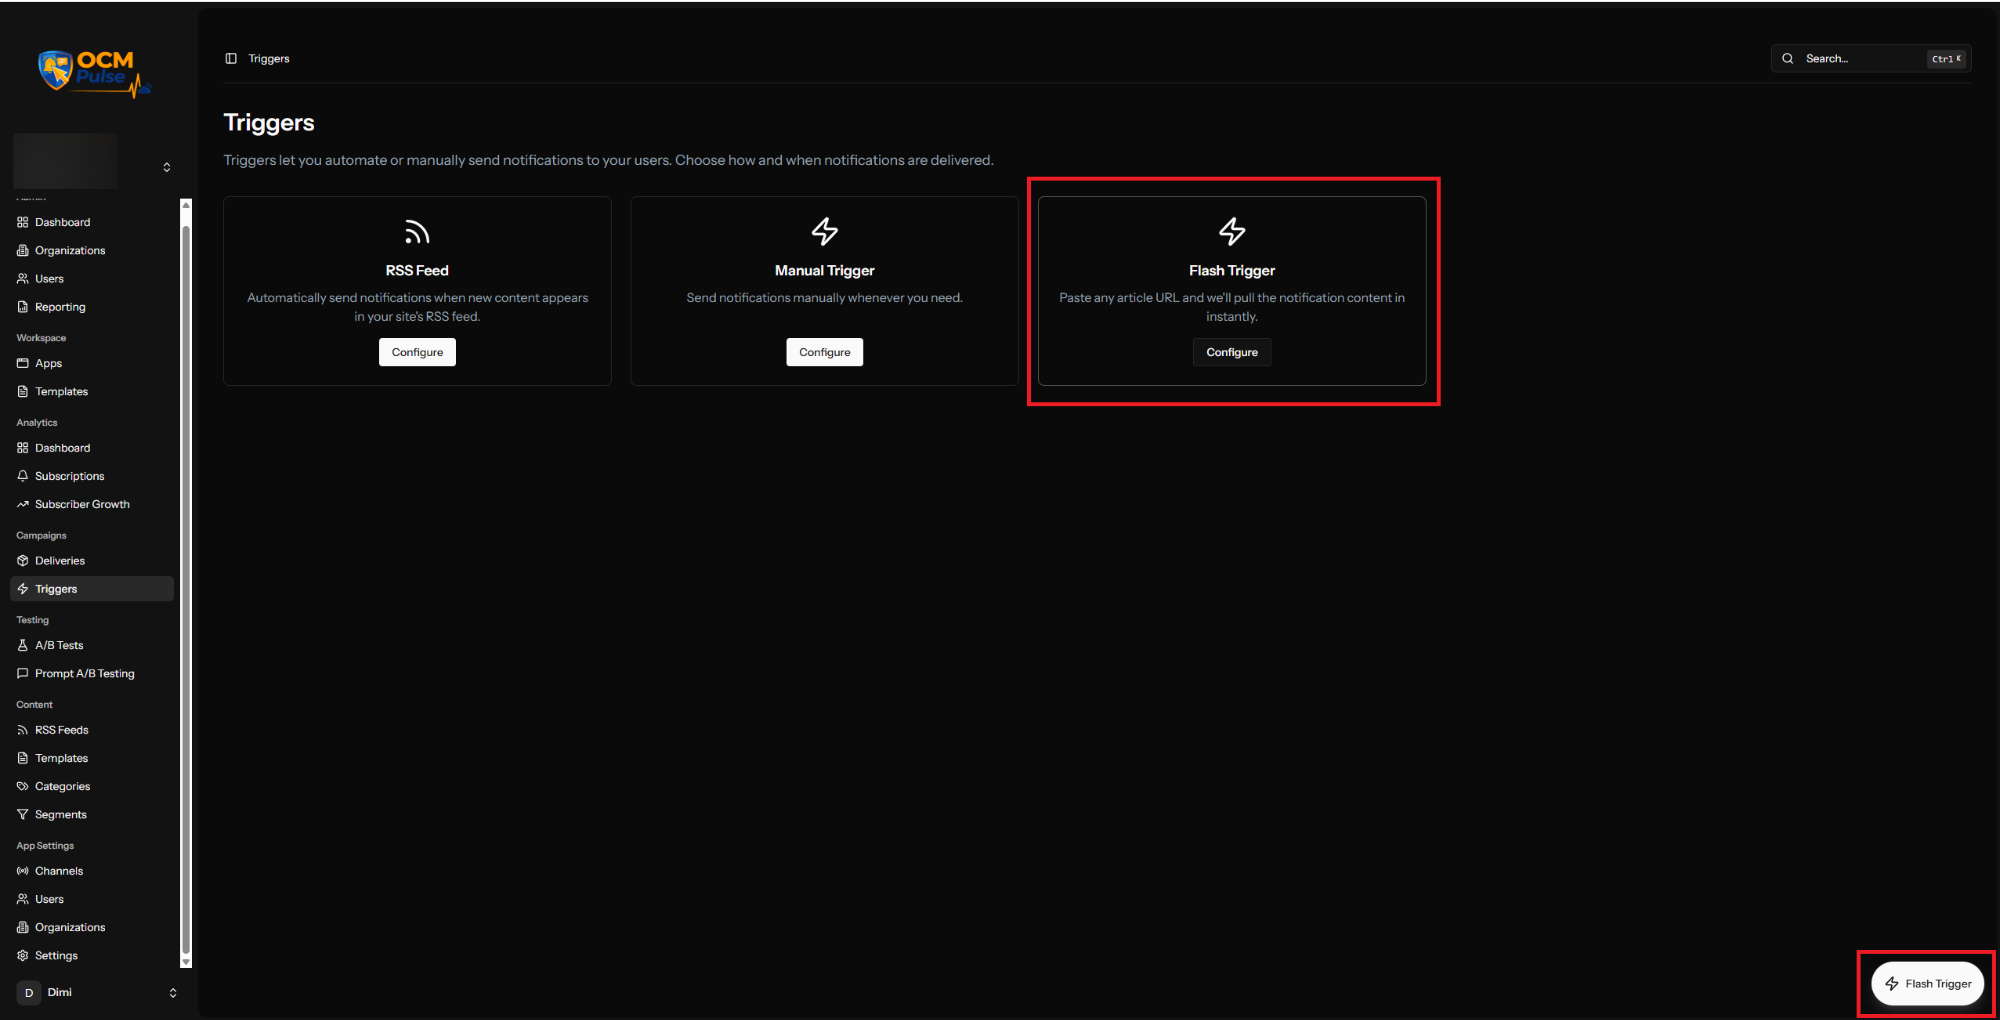
Flash Trigger is available in two places:
- Triggers page — Navigate to your app, click Triggers, then click Configure on the Flash Trigger card.
- Quick access button — A floating ⚡ Flash Trigger button appears in the bottom-right corner of every page within an app, so you can send one without navigating away from what you're doing.
Both entry points open the same form.
How It Compares to Other Triggers
| Flash Trigger | Manual Trigger | RSS Trigger | |
|---|---|---|---|
| Best for | Sending fast, from an existing article | Building a notification from scratch, with full control | Fully automated sends on new content |
| Content source | Auto-filled from a URL | Written manually, via AI Content Assistant, or from a Template | Pulled from your RSS feed |
| Advanced options | Action buttons, TTL, Persistent Notification | Action buttons, TTL, Persistent Notification, frequency cap override | Check Frequency, Items Per Check, built-in A/B testing |
| Requires setup beforehand | No | No | Yes (an RSS Feed must exist first) |
If you need template variables or a frequency cap override, use Manual Trigger instead. For fully hands-off automation, see RSS Trigger.
Sending a Notification
1. Paste the Article URL
Paste the URL of the article you want to notify subscribers about, then click Auto-fill.
The URL is fetched server-side and its metadata pulled into the form below. If a field doesn't auto-fill correctly (for example, a page with no Open Graph image), fill it in manually before sending — every field remains editable after auto-fill.
2. Review the Fields
| Field | Required | Notes |
|---|---|---|
| Title | Yes | Pulled from the page title / Open Graph tags |
| Body | No | Optional notification body text |
| Click URL | Yes | Defaults to the article URL you pasted |
| Image URL | No | Optional hero image shown in supported notifications |
3. Set Category and Audience
- Category (optional) — Organize this delivery for filtering and reporting. If you've set up Routing Rules, a category may be auto-selected based on the Click URL.
- Target audience — Defaults to All subscribers; choose a segment to narrow it. See Segments Overview.
4. Choose Delivery Timing
| Option | Description |
|---|---|
| Send immediately | Default. Notification goes out as soon as you send. |
| Schedule for later | Pick a date and time in your app's timezone. |
5. Advanced Options (Optional)
| Setting | Description |
|---|---|
| Action Buttons | Add up to 2 clickable buttons to the notification |
| Time to Live (TTL) | How long the notification is stored if the device is offline |
| Persistent notification | Keep the notification visible until the user interacts with it (Chrome/Edge only) |
6. Send
Click Send Now (or Schedule, if you selected a future time). You'll be taken to the Deliveries list, where you can track status in real time.
Tips
- Flash Trigger is a good fit for breaking news or time-sensitive posts where speed matters more than fine-tuning.
- For recurring content types (a daily roundup, a weekly digest), a Message Template saves you retyping the same fields each time — Flash Trigger doesn't support templates.
- For fully automated sends whenever new content is published, set up an RSS Trigger instead. Flash Trigger is always a manual, one-at-a-time action.